From leopard print to polka dots, we’ve seen it all. Printed denim has become a recent fashion staple. What about hearts for this upcoming Valentine’s Day? Whether you want to surprise someone special or create a pair of your own, this heart print denim look is perfect for any occasion and best of all, it takes less than half an hour to make!
Supplies:
- A pair of denim pants/jeans
- White fabric paint
- Styrofoam plate or a tray for the paint
- Makeup sponge/wedge
- A fabric marking pencil
- Scissors
- Pen
- A colored piece of thin cardboard or card stock
Instructions:
Draw heart
Draw a heart shape approximately 1-1/2 centimeters in width and height onto the back of the card stock.

Make stencil
Fold the card in half and cut the heart shape symmetrically with a pair of scissors, creating a stencil. Trim the ends of the stencil to create a square shape if desired.

Lay pants flat
Lay the denim pants flat on the working surface.

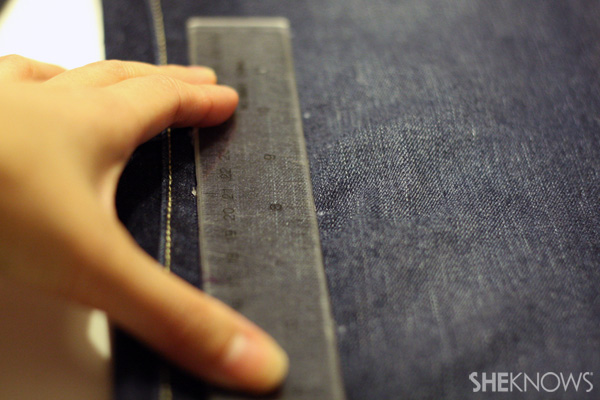
Measure from belt loop
Starting from the bottom of the belt loop, position the ruler straight down — the top edge of the ruler should be perpendicular to the top edge of the belt loop. If your pair doesn’t have a belt loop, start about one third of the way from the inseam of the pant leg.

Mark first point with fabric pen
Measure two inches down and mark with removable fabric pencil.

Continue to mark at 2-inch intervals
Continue to the end of the pant leg by marking 2-inch intervals.


Begin creating a second line of markings
When you’ve completed one full line of markings, start the second line by measuring two inches to the right from the second marking of your first line. The idea is to create a diamond pattern.

Continue marking every four inches
Once you’ve marked the first marking on your second line, continue by measuring and marking every four inches all the way down to the end of the pant leg. Ensure your markings are parallel to your first line.


Prepare paint
Pour some fabric paint onto your plate/tray, and apply some onto the sponge. Dab some of the excess paint off.
Place stencil on marking
Place the stencil on top of the last marking from your first roll.

Apply paint over stencil
Apply the paint over the stencil. Start lightly with one layer of paint and go over repeatedly as needed. If you make a mistake, quickly use a wet cloth and remove the paint.

Skip one marking at a time
Work your way up, skipping one marking at a time. This is necessary to create a diamond pattern.


Start on the second line
When you’ve completed the entire first line, start on the second line from the bottom up. Remember to check if you’re creating a diamond pattern. No two hearts should be side by side on each row.


Find areas where partial stencils are needed
Once you’ve completed both lines, visually spot areas where partial stencils are needed and apply paint partially.

Line up bottoms of pant legs
To complete the second pant leg, start by lining up the bottoms of the pant legs. Measure the distance between the inseam to the last heart of the first line, and make the same marking on the opposite leg.

Measure and mark the first line
Measure and mark four inches up until you reach the top. Make sure as you make your markings that they are somewhat symmetric to the opposite pant leg.

Create second line
Mark the second line applying the same concept.

Repeat the same steps as the first pant leg
Repeat the same steps as the first pant leg to stencil the hearts and there you have it!

Final product

Quick
tip
Feel free to alter the color of pants/paint
to fully customize
your own!
These are 100 percent washable and loveable.
More Valentine's Day ideas
Make a Valentine's Day mailbox
Host a Valentine's Day party for kids
Single gal's guide to a sweet Valentine's Day
