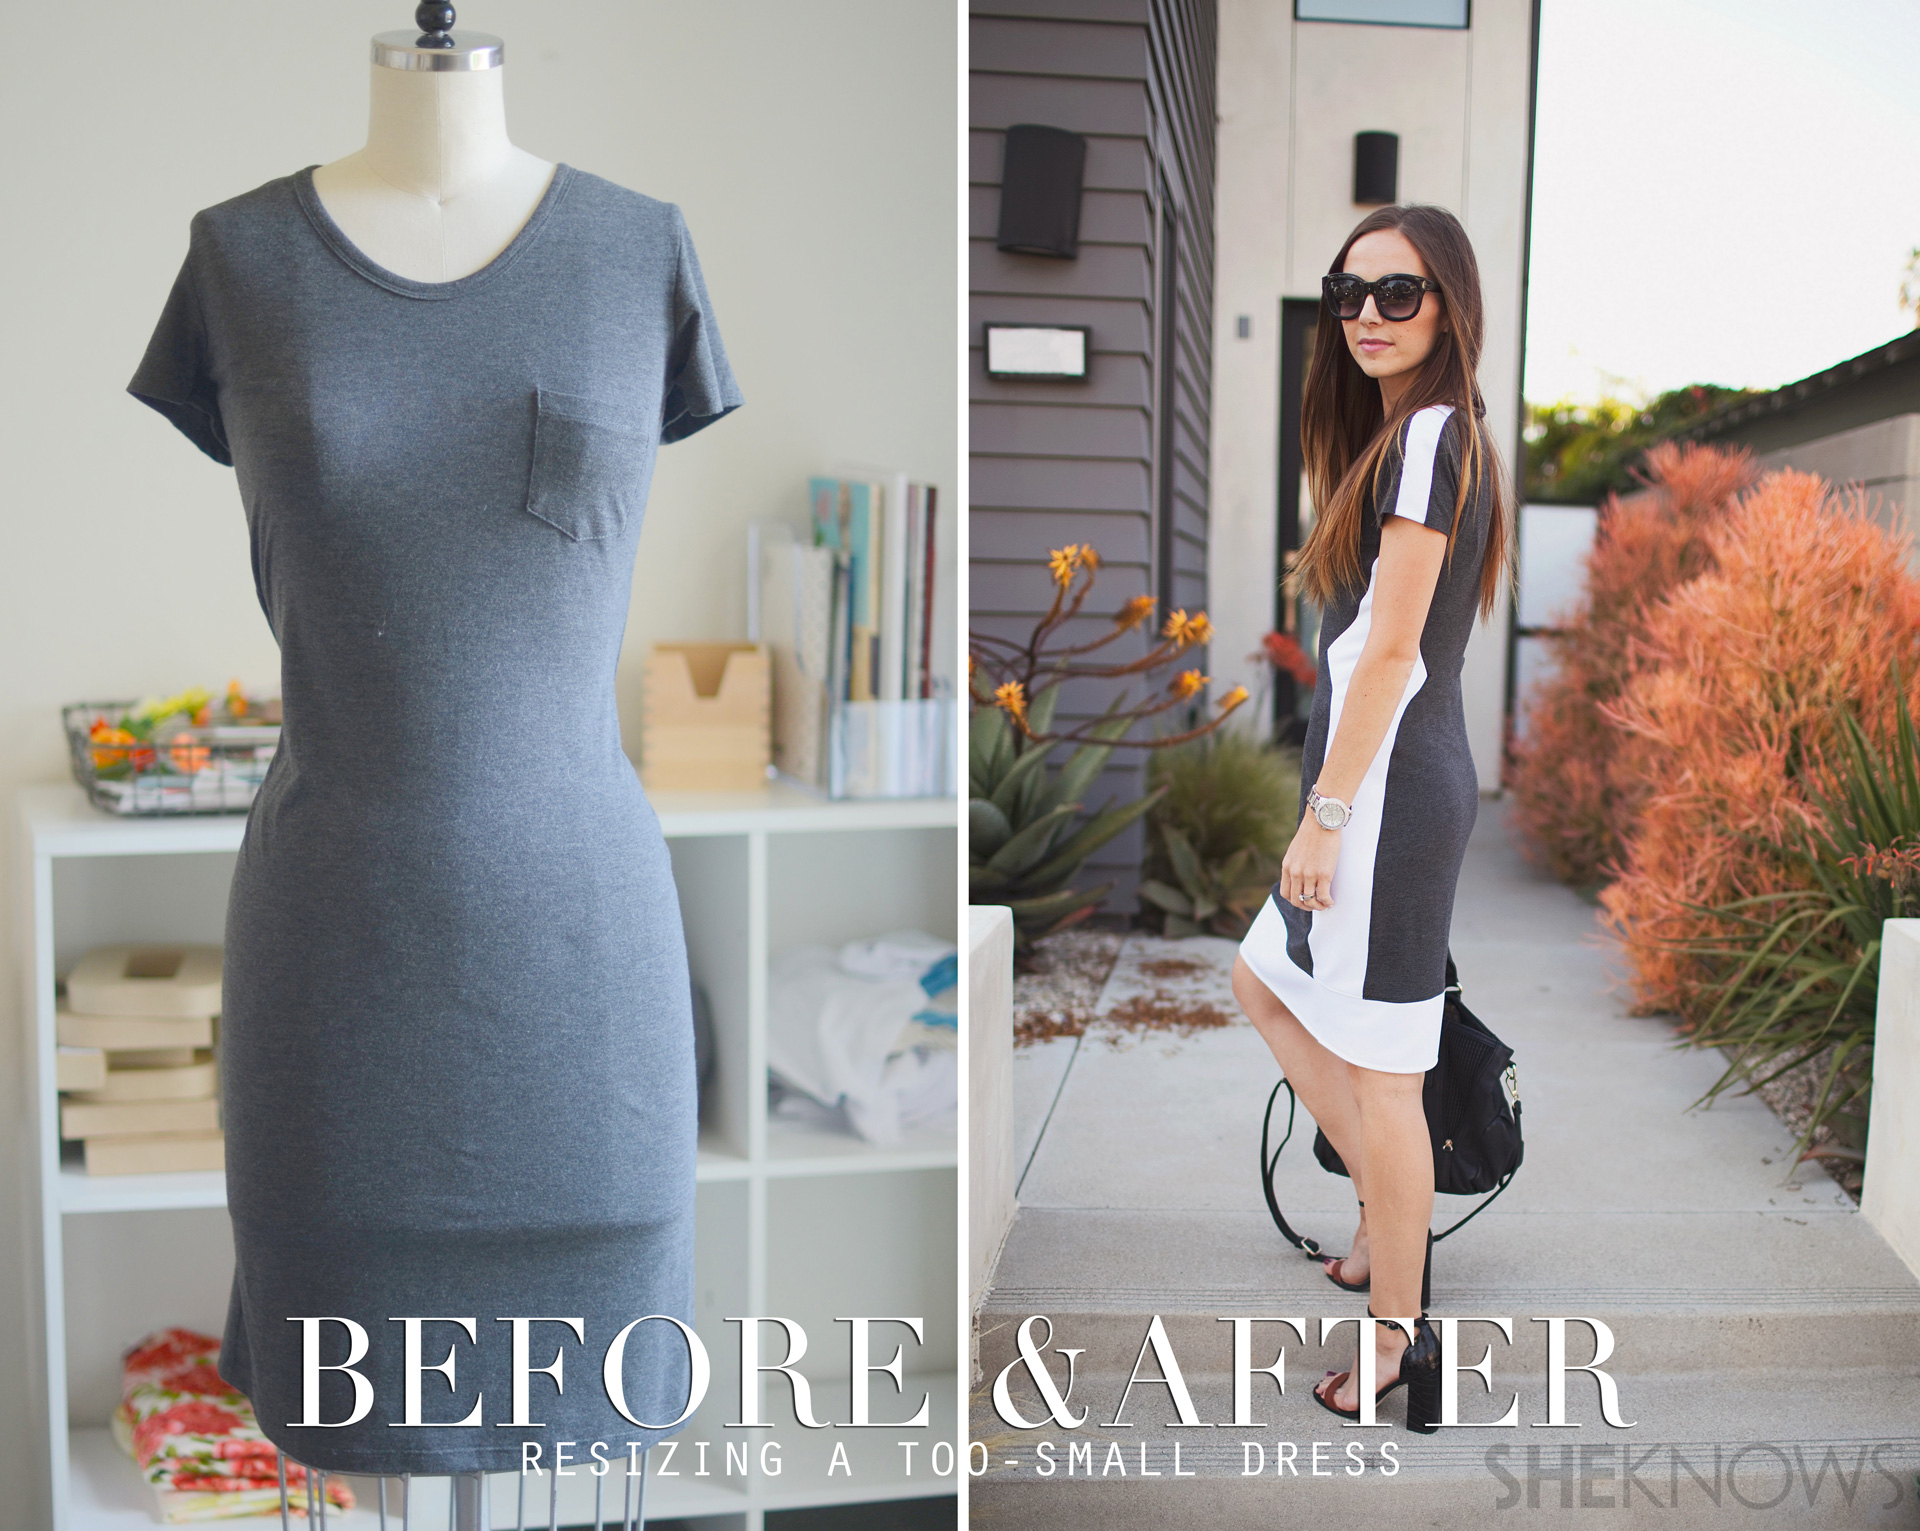
This easy tutorial will teach you how to take any dress that's too small and make it into something new and fabulous that fits perfectly.

Materials:
- Too-small dress
- Contrasting fabric (preferably in a fabric similar to the fabric of your dress — mine were both cotton knits)
- Matching thread

Instructions:
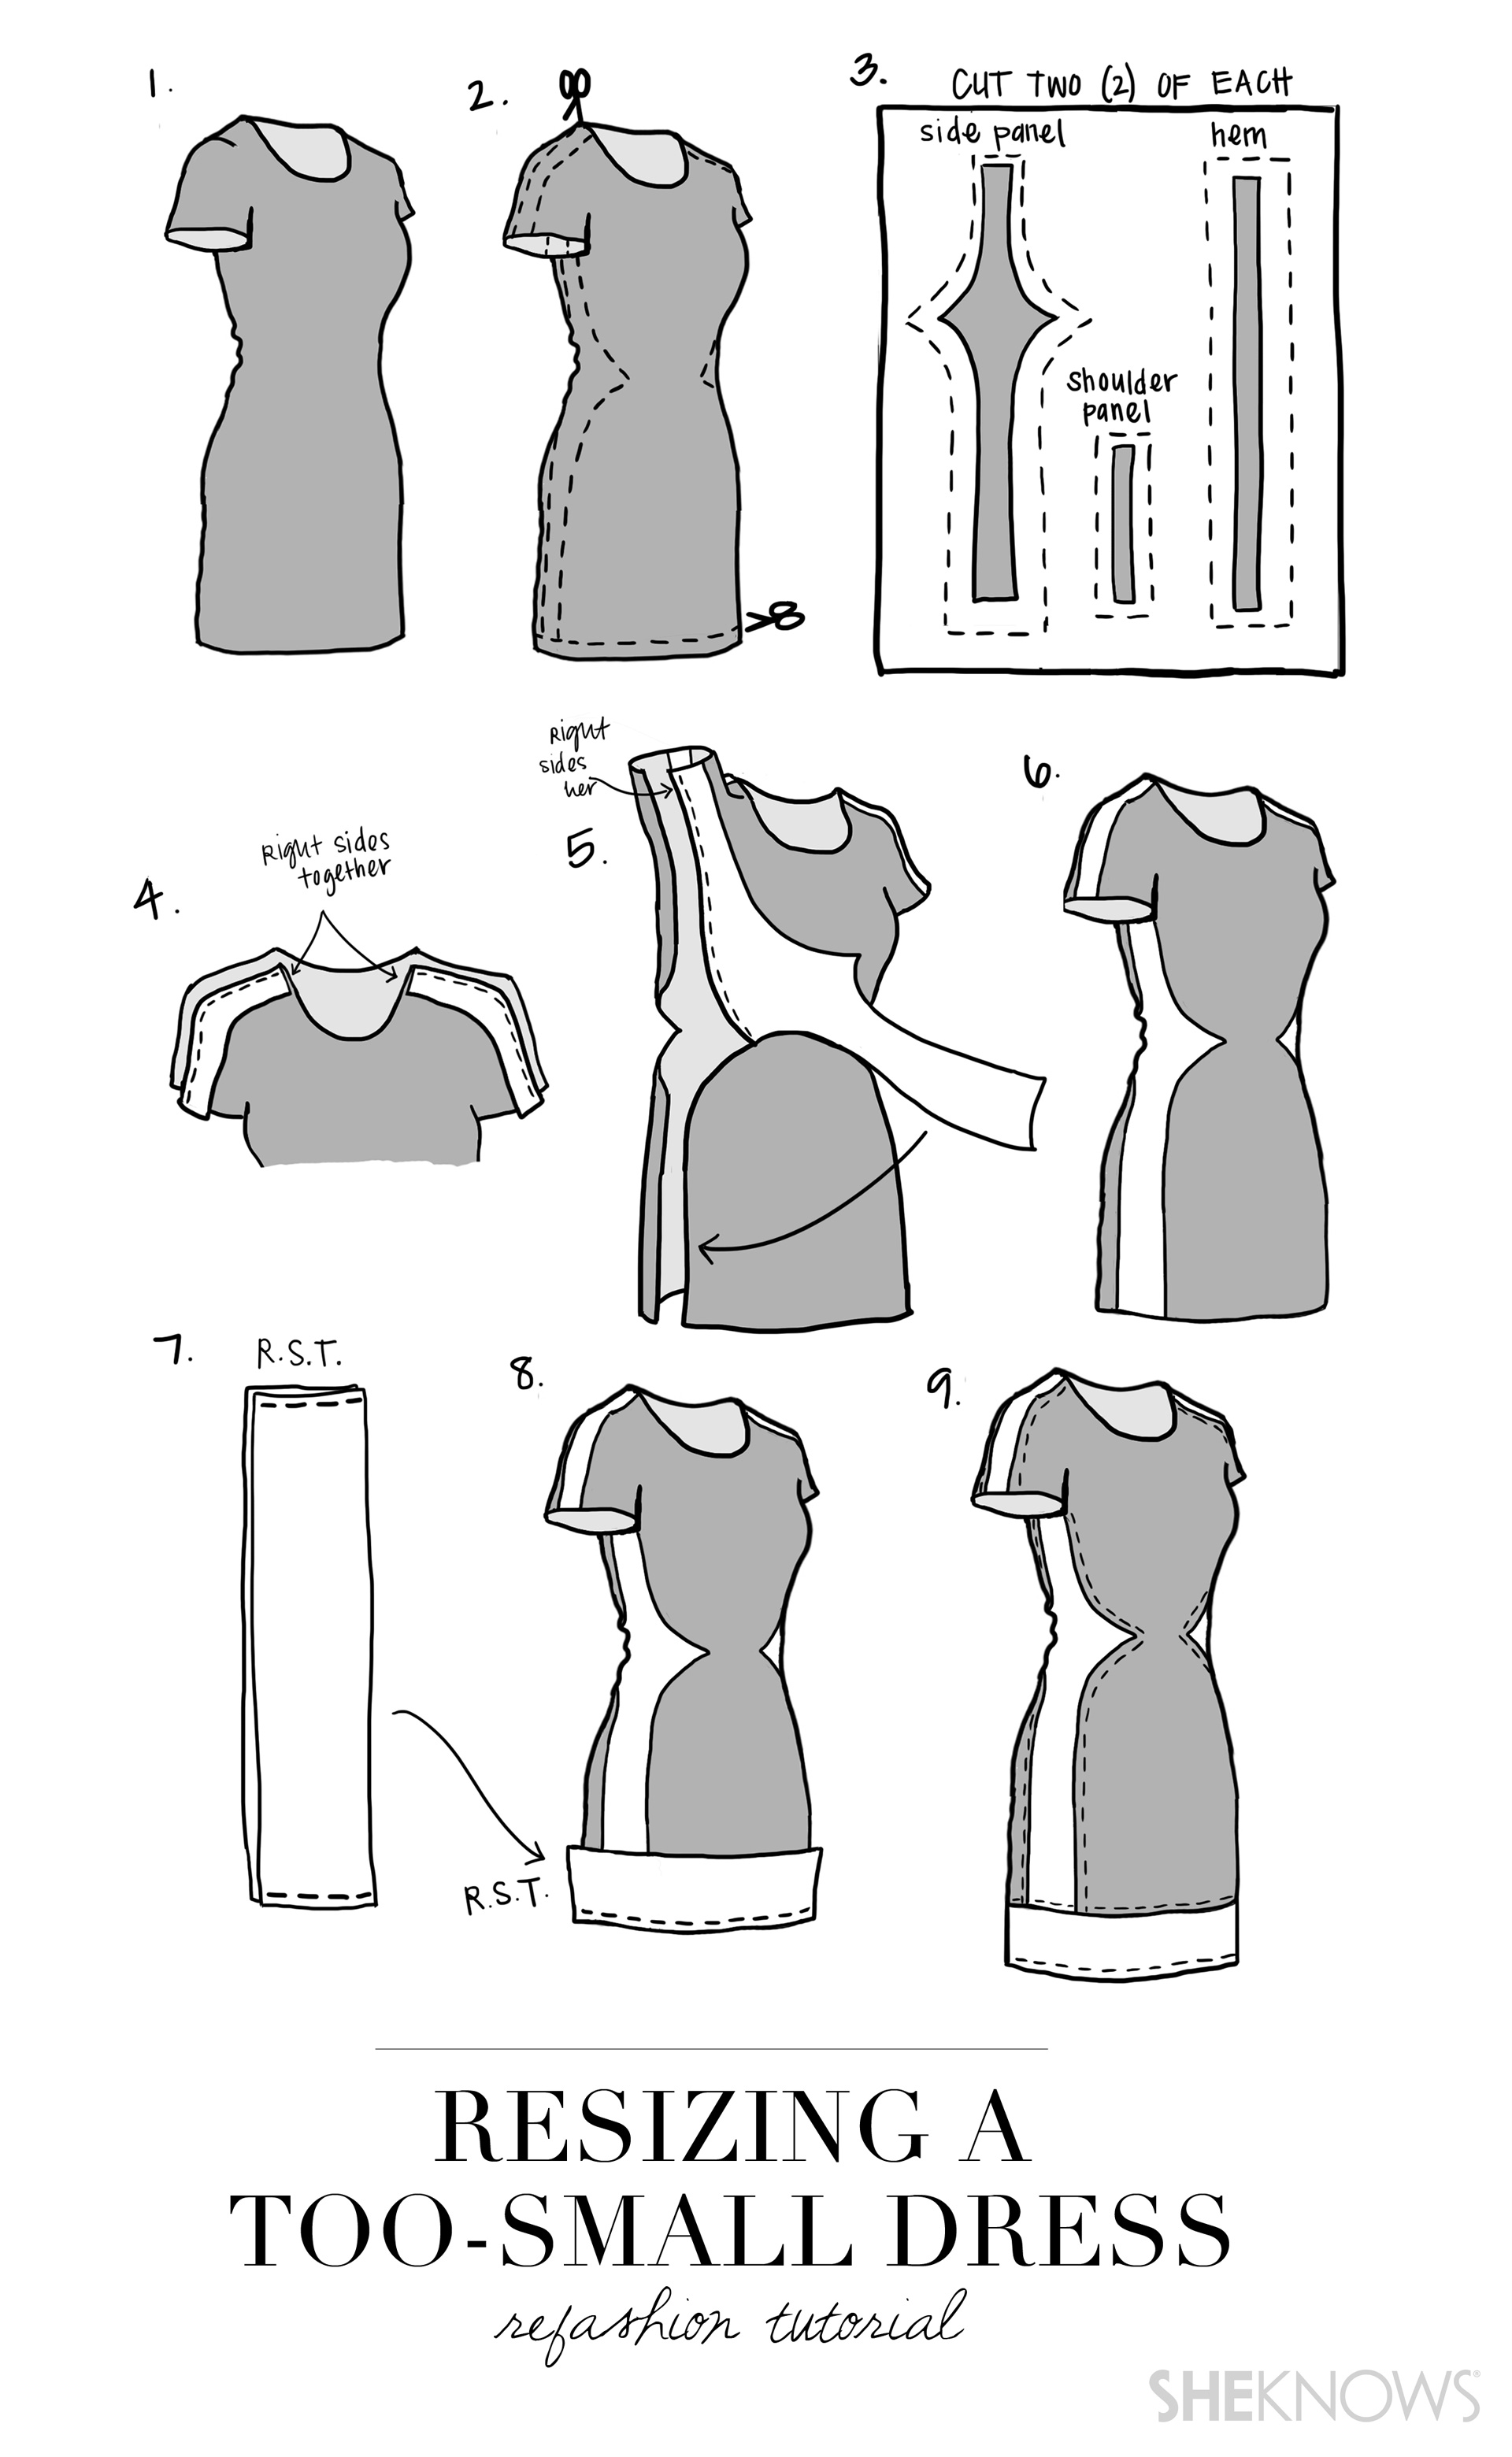
Step 1. Start with your too-small dress.
Step 2. Cut down the shoulder seams on either side of the seam, then down the sides of the dress (as shown in the dotted lines) and around the hem. (Beginner seamstress option: Cut straight down the sides of the dress, rather than cutting to a point at the waistline). Measure in from the original side seam to make the points at the waist on each side equal in size.
Step 3. Fold your contrasting fabric in half, then take all the pieces you just cut from the dress and place them on your contrasting fabric. Cut around them to create new side and shoulder panels as wide as you desire, and a new hem as long as you desire. Make sure you add an extra half an inch of seam allowance around all sides of each new piece.
Step 4. Take your new shoulder panels and with right sides together (the right side of fabric refers to the outer side), sew them into the shoulders, doing one side first and then flip it over and sew the other side with right sides together. Once the shoulder panels are in place, hem at the sleeve and the neckline so they match up with the original hems.
Step 5. Now let's put in the side panels. This can get a little bit tricky with the pointed waists, so if you're a beginner seamstress, stick with straight side panels. With right sides together, sew the top half of the new side panel to the dress from the end of the sleeve to the point at the waist. Once the top half is sewn, sew the bottom half.
Note: To avoid puckering at the waistline with the pointed tip, gradually angle your seam into the seam allowance as you reach the point. Finish your seam at the point with no seam allowance left — your seam should run right into the edge of the fabric as it hits the point. Then as you attach the bottom half of the panel, start at the edge of the fabric and gradually angle your seam away from the edge of the fabric until you return to your original 1/2-inch seam allowance. Then finish the rest of the seam, sewing at a 1/2-inch seam allowance.
Repeat to attach the second side of the first panel, then repeat to attach both sides of the second side panel.
Step 6. Your dress should now look like this (see illustration).
Step 7. Take your hem pieces and, with right sides together, sew them together on the short sides. You will now have a big loop.
Step 8. With right sides together, take your hem piece and sew it to the bottom of your dress with a 1/2-inch seam allowance. Flip it down and press in place.
Step 9. Hem the bottom of your dress to your desired length. Then top stitch around all your seams so they lay flat and look professional (optional). Press all your seams flat and you're done.

More style advice
10 Big hats for summer
Sleek outfits for cold offices
Clothes that look like quilts? Surprisingly chic