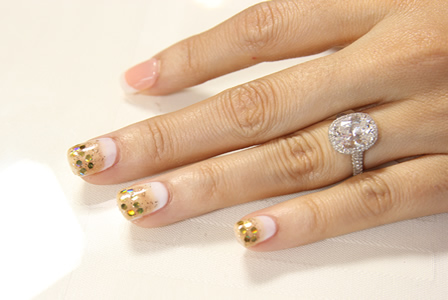
We recently sat down with the blonde bombshell who is responsible for Nail Files on TV Guide Network. One of the hot trends she raved about was the ombre manicure. We, of course, couldn't resist, so here's her take on going ombre with gel polish at home.
The road to ombre
There have been several different takes on the ombre manicure trend to hit the web -- and we're adding to the pot. Katie's version is nude , sparkly and easy to do at home. We love that!
First and foremost, you're going to need an at-home gel kit. It's a bit of a splurge, but if you're into making your manicures last longer, it's worth it! Our advice? Scour the beauty market and sites like Amazon and eBay to find one in your price range. Plan B? Try it with traditional nail polish!
Watch the video tutorial
Katie Cazorla demonstrates an at-home gel manicure, ombre style.
Base coats are always important, but even more so when it comes to doing a gel polish manicure. "It's how all the rest of your gel colors or art is going to adhere to your nail," said Katie.
Step 1: Always apply a base gel.
Step 2: Remember, you're going to cure your nails between each coat using the LED light that comes with your gel kit.
Step 3: Apply a coat of the lightest color on the whole nail bed.
Step 4: Apply the darker shade on half of the nail bed. Don't worry about creating perfect lines! You want it to look organic.
Step 5: Apply another coat of the darker color slightly above the halfway point from step 4.
Step 6: Repeat the previous step until you've achieved the desired ombre effect.
Step 7: Add a coat of glitter for extra pizzazz and seal it all in with a top coat.
And when it comes to curing between each of your coats, the time can vary, but it's generally anywhere between 30 seconds to a minute.
Another great thing about gel manicures, per Katie, is that it's really easy to get creative and experimental with your nail designs.
"If you make a mistake, you can just wipe it off, as with [regular] polish you have to wipe everything off and start from the beginning. Once the color has been cured, you're in the clear."
More nail designs
How to rock the accent nail
Manicure idea: Neon nail tips
How to dress up your hobbit feet